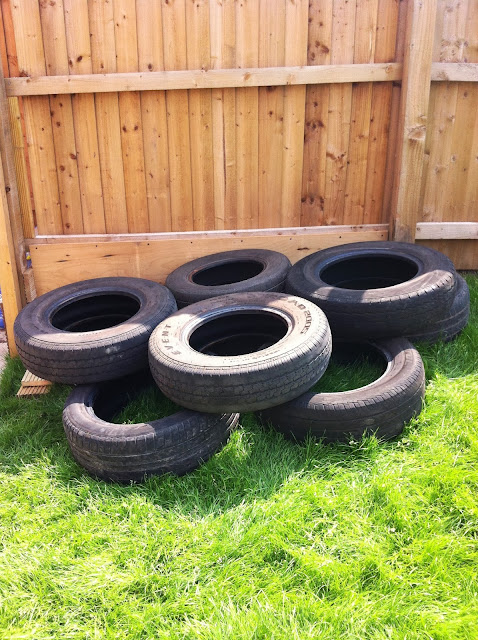
When I first started researching the garden and what I wanted to do, this idea was one of the early pins and I knew it was just what I wanted in the garden. We don't have the time at the moment to maintain a large garden, so the new one needed to be as low maintenance as possible. However I still wanted some plants and colour to it, I couldn't stand to have a whole garden full of grass. The tyres seemed the perfect solution - providing lots of colour all year round, as well as a form of low maintenance rockery/flower bed that I wanted. And they looked so different!
So first of all I sourced some tyres at my local garage and the hubs lugged all fifteen into the back garden for me! Then I washed them all down to get any oil and scummy residue off them.
 We then planned out our tyres. It took a few go's, with me ordering Mr H about and him patiently following my bidding to get the layout we liked. As the position of the tyres is on a slope we used some offcuts of decking to make the tyres stand a little more level, which will be covered by the plants.
I used a simple glossy spray paint as it is much easier on such a large surface to get the coverage. It took me a bit of practice to get the technique right and there were a few runs to start with. If you hold the can too close, or spray too much on the same part, the paint will run. The best thing to do is to hold it a slight distance away and spray back and forth as you cover the area. Beware of finger cramp though - I had to do mine in several sittings as both my index fingers got pretty sore after an hour or so of spraying!
My technique for tyre spraying was to first lay each tyre down and spray the side closest to me. I would then turn the tyre, holding it on the inside, to the next part that needed spraying. Continue this until the whole tyre is done.
Once the tyres were dried I propped them up on the wall so I could get to the part that had been sat on the floor a little easier. I sprayed a second coat this way, this time waiting until each layer was dry before turning.
Once all the tyres were done, I left them for a few
I then put them in place and, using some extra soil from where we had dug out for the decking, and multi-purpose compost on top, I filled the tyres. I made sure to fill inside the rim of each one, otherwise the soil would gradually settle a leave a gaping hole in the middle!
Now they were ready for planting! It took me a while to decide what to use - I knew I wanted an ornamental evergreen (such as Buxus) and also some plants that have vibrant foliage would provide colour throughout the year. However when I visited the garden centre Buxus was extremely expensive, so I settled on some Choisya Tern instead. I then bought a selection of rockery plants (alpines), which will grow to eventually cover the area in a carpet of foliage and colour. I also picked out a grass, to add some height, and a couple of variegated plants which will provide a diversity of foliage throughout the winter months. Finally I finished them off with some violas, which with their pretty flowers will dance joyfully, and will hopefully reseed themselves and return next year.
I am planning on planting bulbs throughout the winter so that the tyres will become an area of constantly regenerating blooms, providing colour and life to the garden. I have written myself a list of bulbs and when they should be planted and plan on tackling this as the autumn comes in. I love snowdrops and bluebells, so these are top of my list, along with tulips, daffodils for the spring, followed by crocus', hyacinth and begonia's for the summer.
I absolutely love the finished product. At one stage I worried they made the garden look a bit like a trailer park, and even painted and filled with soil they didn't look quite right. However now they have found their purpose and are filled with life, I am so pleased with them. They really have been a labour of love and I feel they provide a unique focus point for our garden and fit in perfectly with the bright, playful feel we wanted all along.
 |
| Before.... |
 |
| ...and after |
So....what do you think...?


