As some of you may be aware, after moving to America last January, my family and I are relocating back home to England in four short weeks. After 18 months our time in American is swiftly drawing to a close. It has been a crazy journey with many highs and lows and although I am thrilled to be returning to my homeland, I am perhaps a little sad to leave the American Dream behind. Before we fly away, I wanted just share just a few words on our time here.
How to Ink Stain Paper To Create A Vintage Look
Thursday, 26 May 2011
I keep flicking through crafting mags or various luscious blogs and seeing lovely embellishments or cards where the edges of the paper had been inked to make it look aged. I always thought how great this looked and how I would like to try it out myself. Now I know for some of you more experienced crafters this may seem very straight forward, but to someone who had never done this before I really didn't have a clue how to go about it. And clearly it's too straight forward for many a tutorial as I couldn't find that much to show me the way! But after hunting around I threw a few ideas together and came up with a plan of attack, and thought I would record it as I did - so here you go...
Reflecting Back
Friday, 13 May 2011
Isn’t it funny how life can change, and how much you change along with it?
I used to write, a lot. I had very little else to do (damn how that’s ringing true at this point in my life too). I wrote stories, lyrics and poems. And I’ve saved them all. So as I have been going through my computer, which is full to bursting point, deleting all the crap, I came across all my old files. It’s so strange looking back through them, they almost recount my youth, moment by moment. The years of bullying and torment, the boys and the heartache and mischief they brought, the steep learning curves and the dreams that I had forgotten about. It’s interesting reading, knowing what I know now and realising how naive I was but also how big I used to dream.
I used to write, a lot. I had very little else to do (damn how that’s ringing true at this point in my life too). I wrote stories, lyrics and poems. And I’ve saved them all. So as I have been going through my computer, which is full to bursting point, deleting all the crap, I came across all my old files. It’s so strange looking back through them, they almost recount my youth, moment by moment. The years of bullying and torment, the boys and the heartache and mischief they brought, the steep learning curves and the dreams that I had forgotten about. It’s interesting reading, knowing what I know now and realising how naive I was but also how big I used to dream.
Our trip to Tahoe with a baby and a dog!
Tuesday, 10 May 2011

New Wall Letters Finally Done!
Monday, 9 May 2011
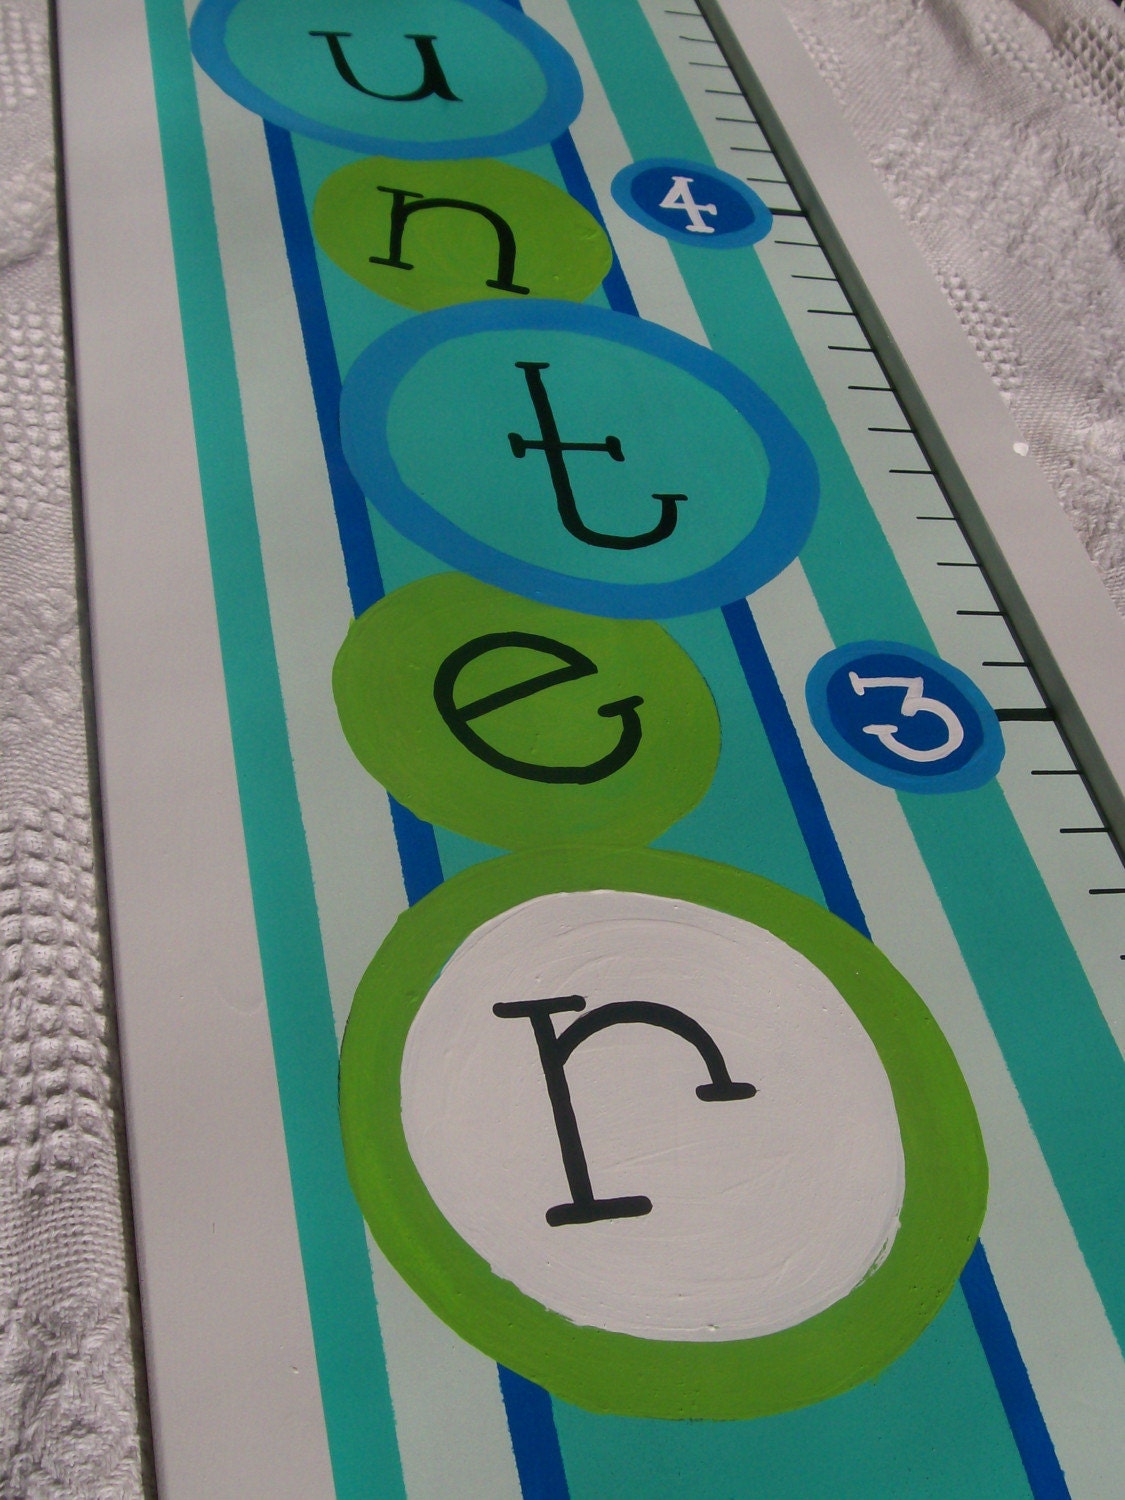
I am so pleased, my latest set of hand-painted wall letters are finally complete! They were made with lots of love and care for the nursery of the upcoming first baby of our close friends and I am thrilled with the result! They are up on Etsy now!
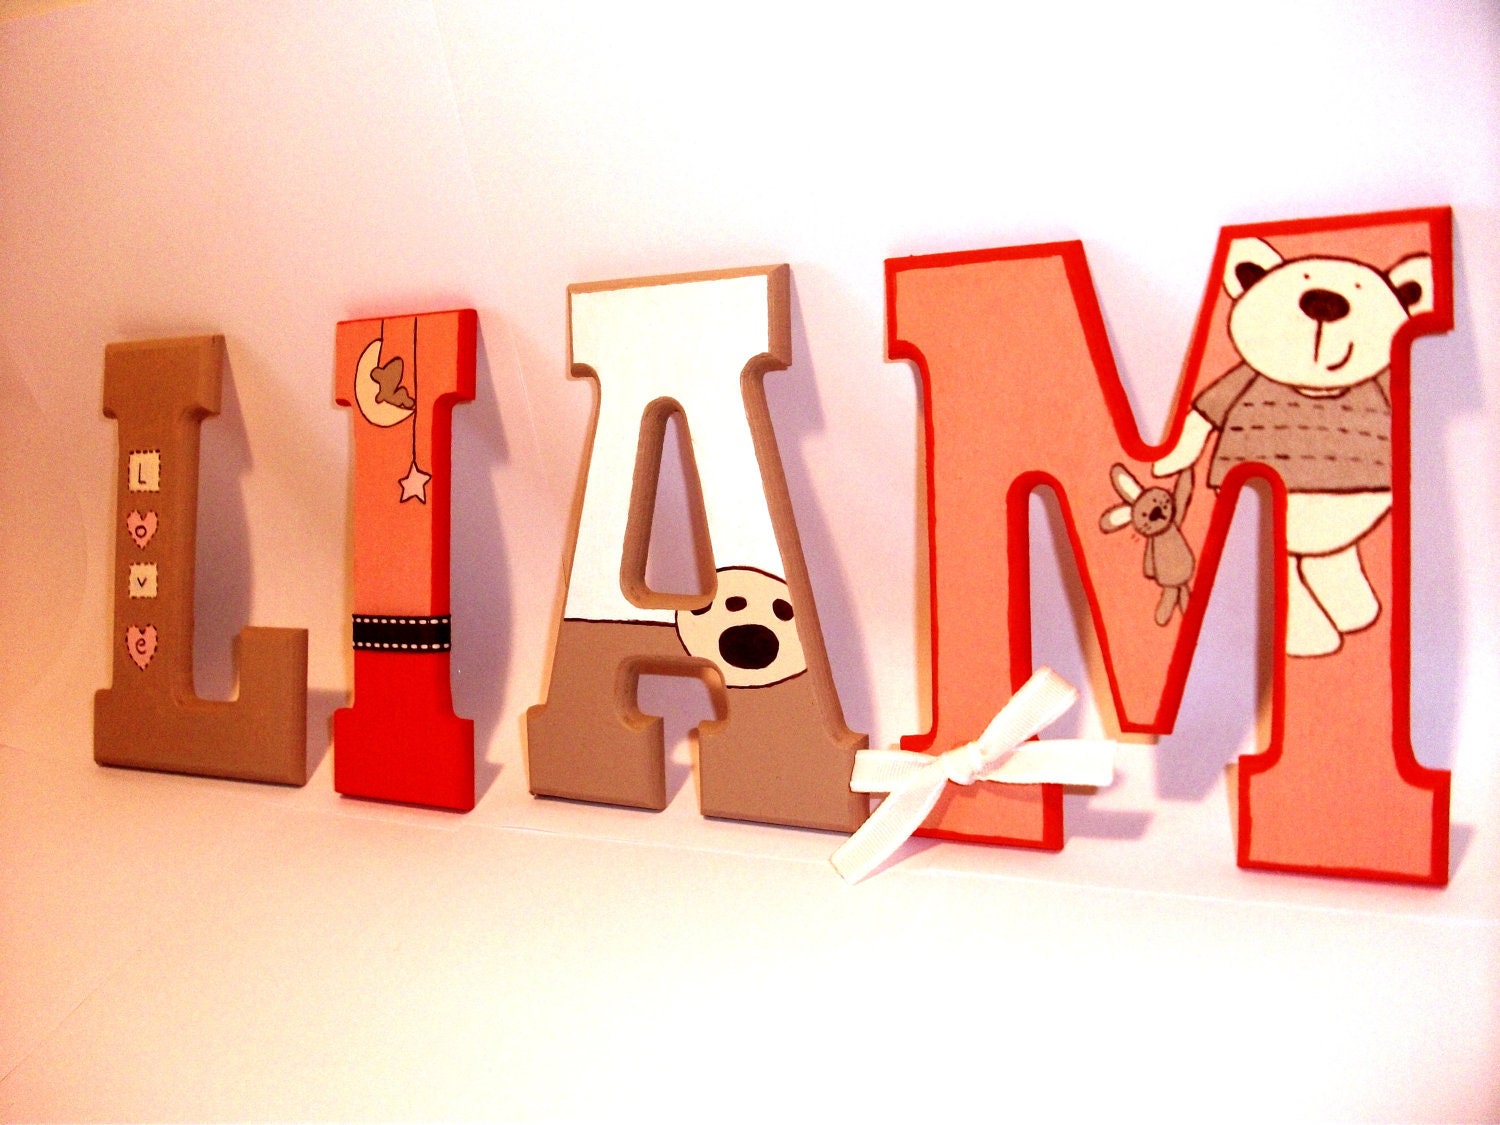
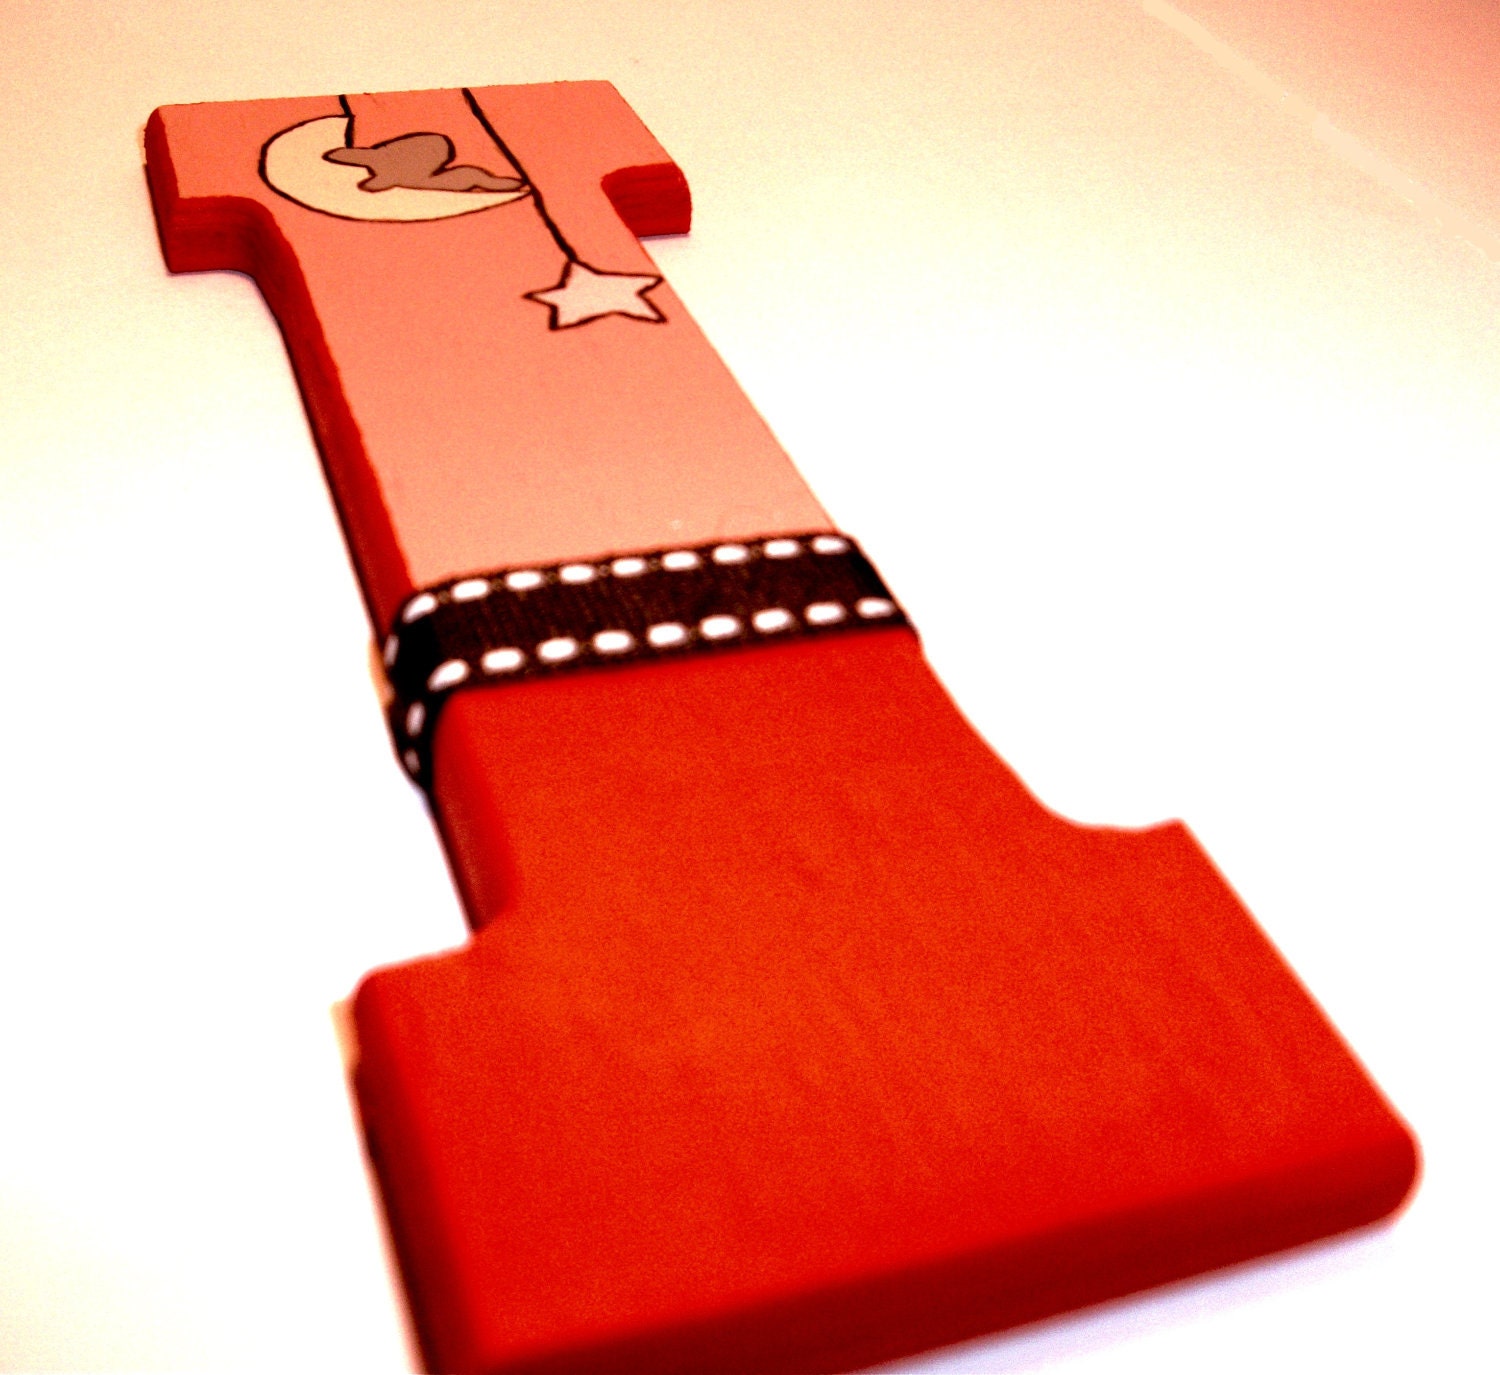
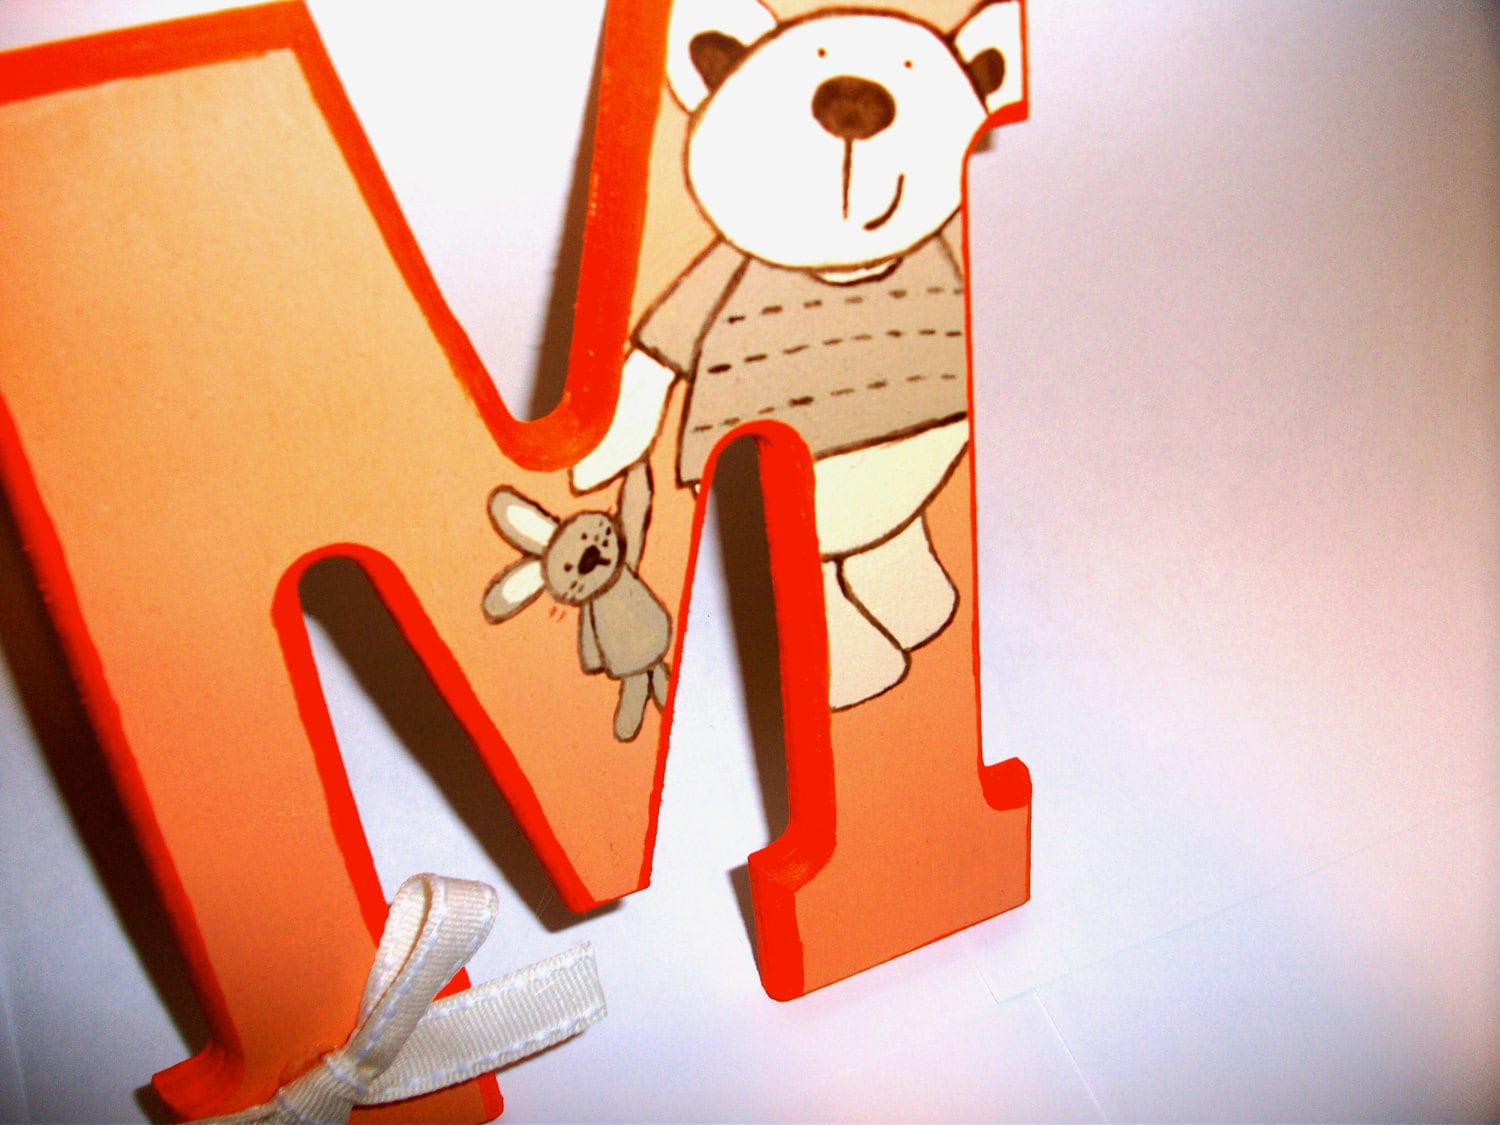
by Hollybobbs
Don't forget to check out my latest giveaway to win a great photography print from Rae Of Light Photography!
The 12 Dresses of Holly
Thursday, 28 April 2011
In the first pretty dress,
Mummy dressed me in
Was a lovely dress made of denim.

In the second pretty dress,
Mummy dressed me in
I wore a checked dress,

And a lovely dress made of denim.
In the third pretty dress,
Mummy dressed me in
I cuddled Moo Moo,

I wore a checked dress,
And a lovely dress made of denim.
In the fourth pretty dress,
Mummy dressed me in
We went to the Aquarium,

I cuddled Moo Moo,
I wore a checked dress,
And a lovely dress made of denim
In the fifth pretty dress,
Mummy dressed me in
I sat in my swing,

We went to the Aquarium,
I cuddled Moo Moo,
I wore a checked dress,
And a lovely dress made of denim
In the sixth pretty dress,
Mummy dressed me in
I matched my penguin,

I sat in my swing,
We went to the Aquarium,
I cuddled Moo Moo,
I wore a checked dress,
And a lovely dress made of denim
In the seventh pretty dress,
Mummy dressed me in
I was wearing poppies,

I matched my penguin,
I sat in my swing,
We went to the Aquarium,
I cuddled Moo Moo,
I wore a checked dress,
And a lovely dress made of denim.
In the eighth pretty dress,
Mummy dressed me in
I wore Winnie The Pooh,

I was wearing poppies,
I matched my penguin,
I sat in my swing,
We went to the Aquarium,
I cuddled Moo Moo,
I wore a checked dress,
And a lovely dress made of denim.
In the ninth pretty dress,
Mummy dressed me in
I had a sunhat on,

I played in my Bumbo,
I was wearing poppies,
I matched my penguin,
I sat in my swing,
We went to the Aquarium,
I cuddled Moo Moo,
I wore a checked dress,
And a lovely dress made of denim.
In the tenth pretty dress,
Mummy dressed me in
I chilled out with Jasper,

I had a sunhat,
I played in my Bumbo,
I was wearing poppies,
I matched my penguin,
I sat in my swing,
We went to the Aquarium,
I cuddled Moo Moo,
I wore a checked dress,
And a lovely dress made of denim.
In the eleventh pretty dress,
Mummy dressed me in
I nearly toppled over,

I chilled out with Jasper,
I had a sunhat,
I played in my Bumbo,
I was wearing poppies,
I matched my penguin,
I sat in my swing,
We went to the Aquarium,
I cuddled Moo Moo,
I wore a checked dress,
And a lovely dress made of denim.
In the twelfth pretty dress,
Mummy dressed me in
Was the prettiest dress of all 12,

I nearly toppled over,
I chilled out with Jasper,
I had a sunhat,
I played in my Bumbo,
I was wearing poppies,
I matched my penguin,
I sat in my swing,
We went to the Aquarium,
I cuddled Moo Moo
I wore a checked dress,
And a lovely dress made of denim.
Look out for Hollybobbs' latest giveaway, coming tomorrow.
How To Put Together The Perfect Nursery
Monday, 18 April 2011
When I was putting together Holly's nursery, a lot of ideas went into consideration - my own taste (modern, contemporary with a secret lust for vintage), what I wanted for my new baby (she WILL like butterflies!) and what would create a calming, happy environment for her. I knew I wanted pink to be in there, but not bright, in-your-face illuminous pink. When I came across the Cocalo bedding range at Babies R Us, I knew this was the one. I took my lead from this beautiful bedding and went from there.
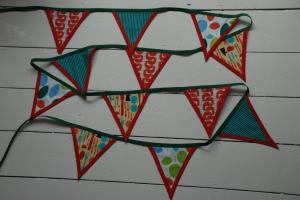
So how can you put together your dream nursery? There are so may resources out there now that can help inspire you. A quick search on Google Images brings up a whole host of amazing ideas for you to start with, a trip to Project Nursery brings up more delicious designs, or how about this great Etsy team, Posh Nursery, who also have a facebook page, for some handmade touches? To demonstrate how I found my ideas, I picked one main item which would inspire the nursery. I decided to use this bunting as a jumping-off point:
Lime Green and Aqua Blue Bunting


So with some time and research you too can find the perfect inspirations for any theme! Go on, have a go, I'd love to see your results!
So how can you put together your dream nursery? There are so may resources out there now that can help inspire you. A quick search on Google Images brings up a whole host of amazing ideas for you to start with, a trip to Project Nursery brings up more delicious designs, or how about this great Etsy team, Posh Nursery, who also have a facebook page, for some handmade touches? To demonstrate how I found my ideas, I picked one main item which would inspire the nursery. I decided to use this bunting as a jumping-off point:
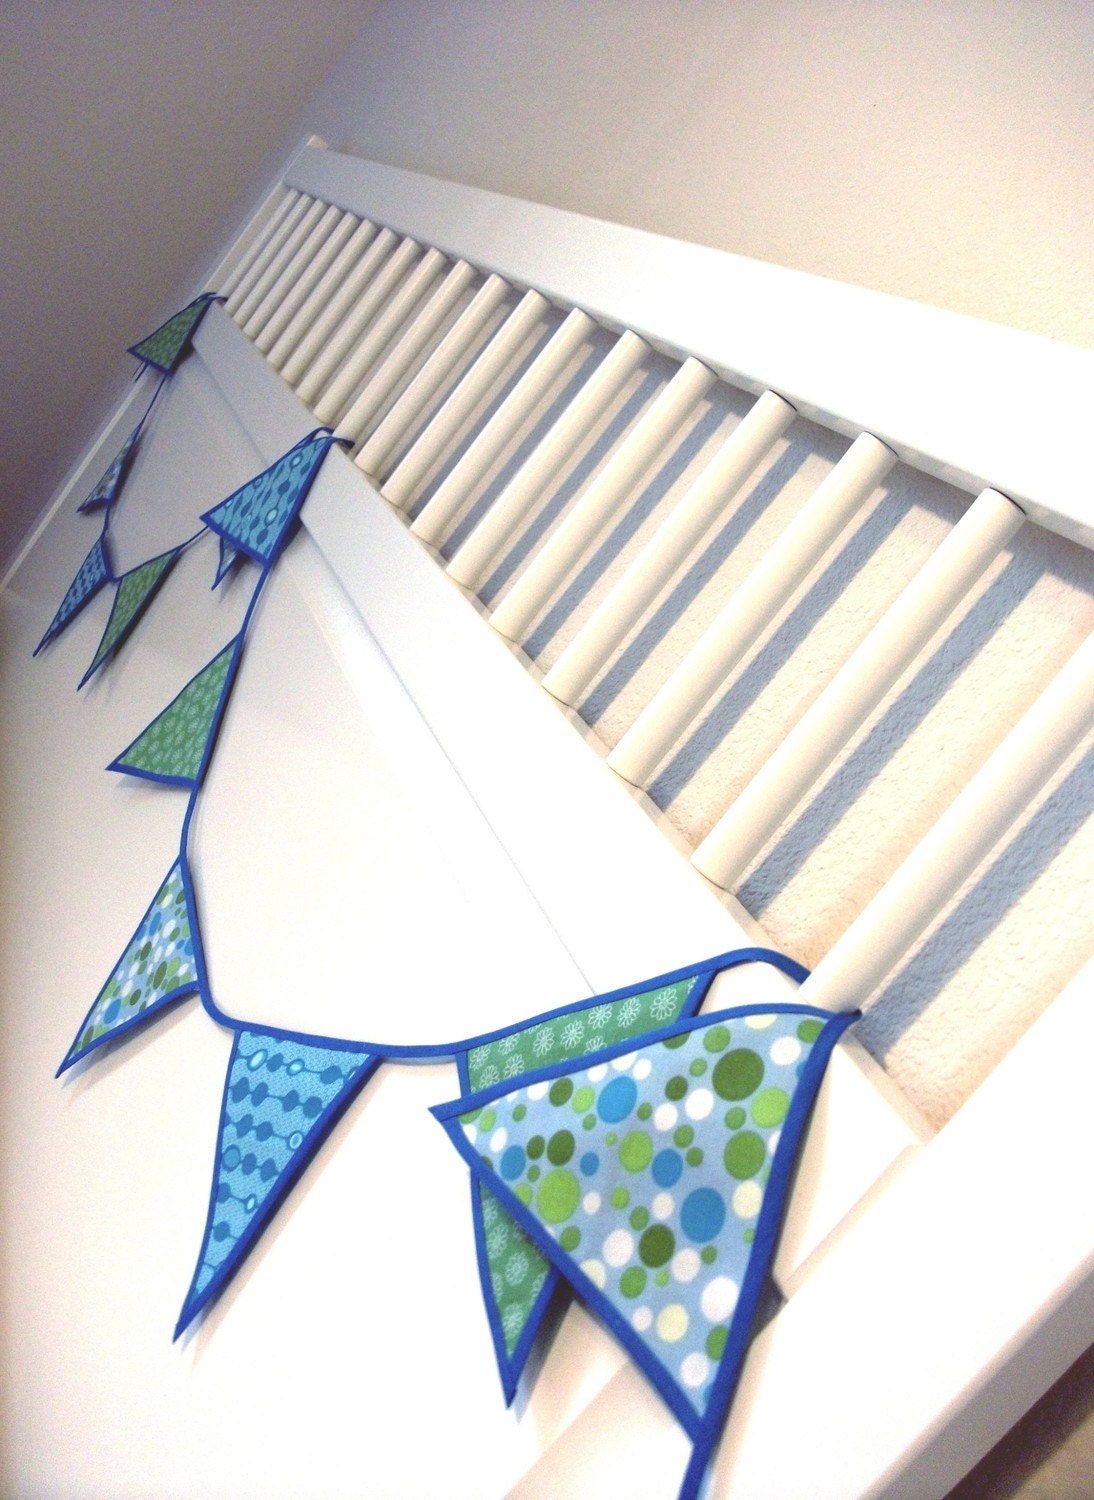 |
Lime Green and Aqua Blue Bunting
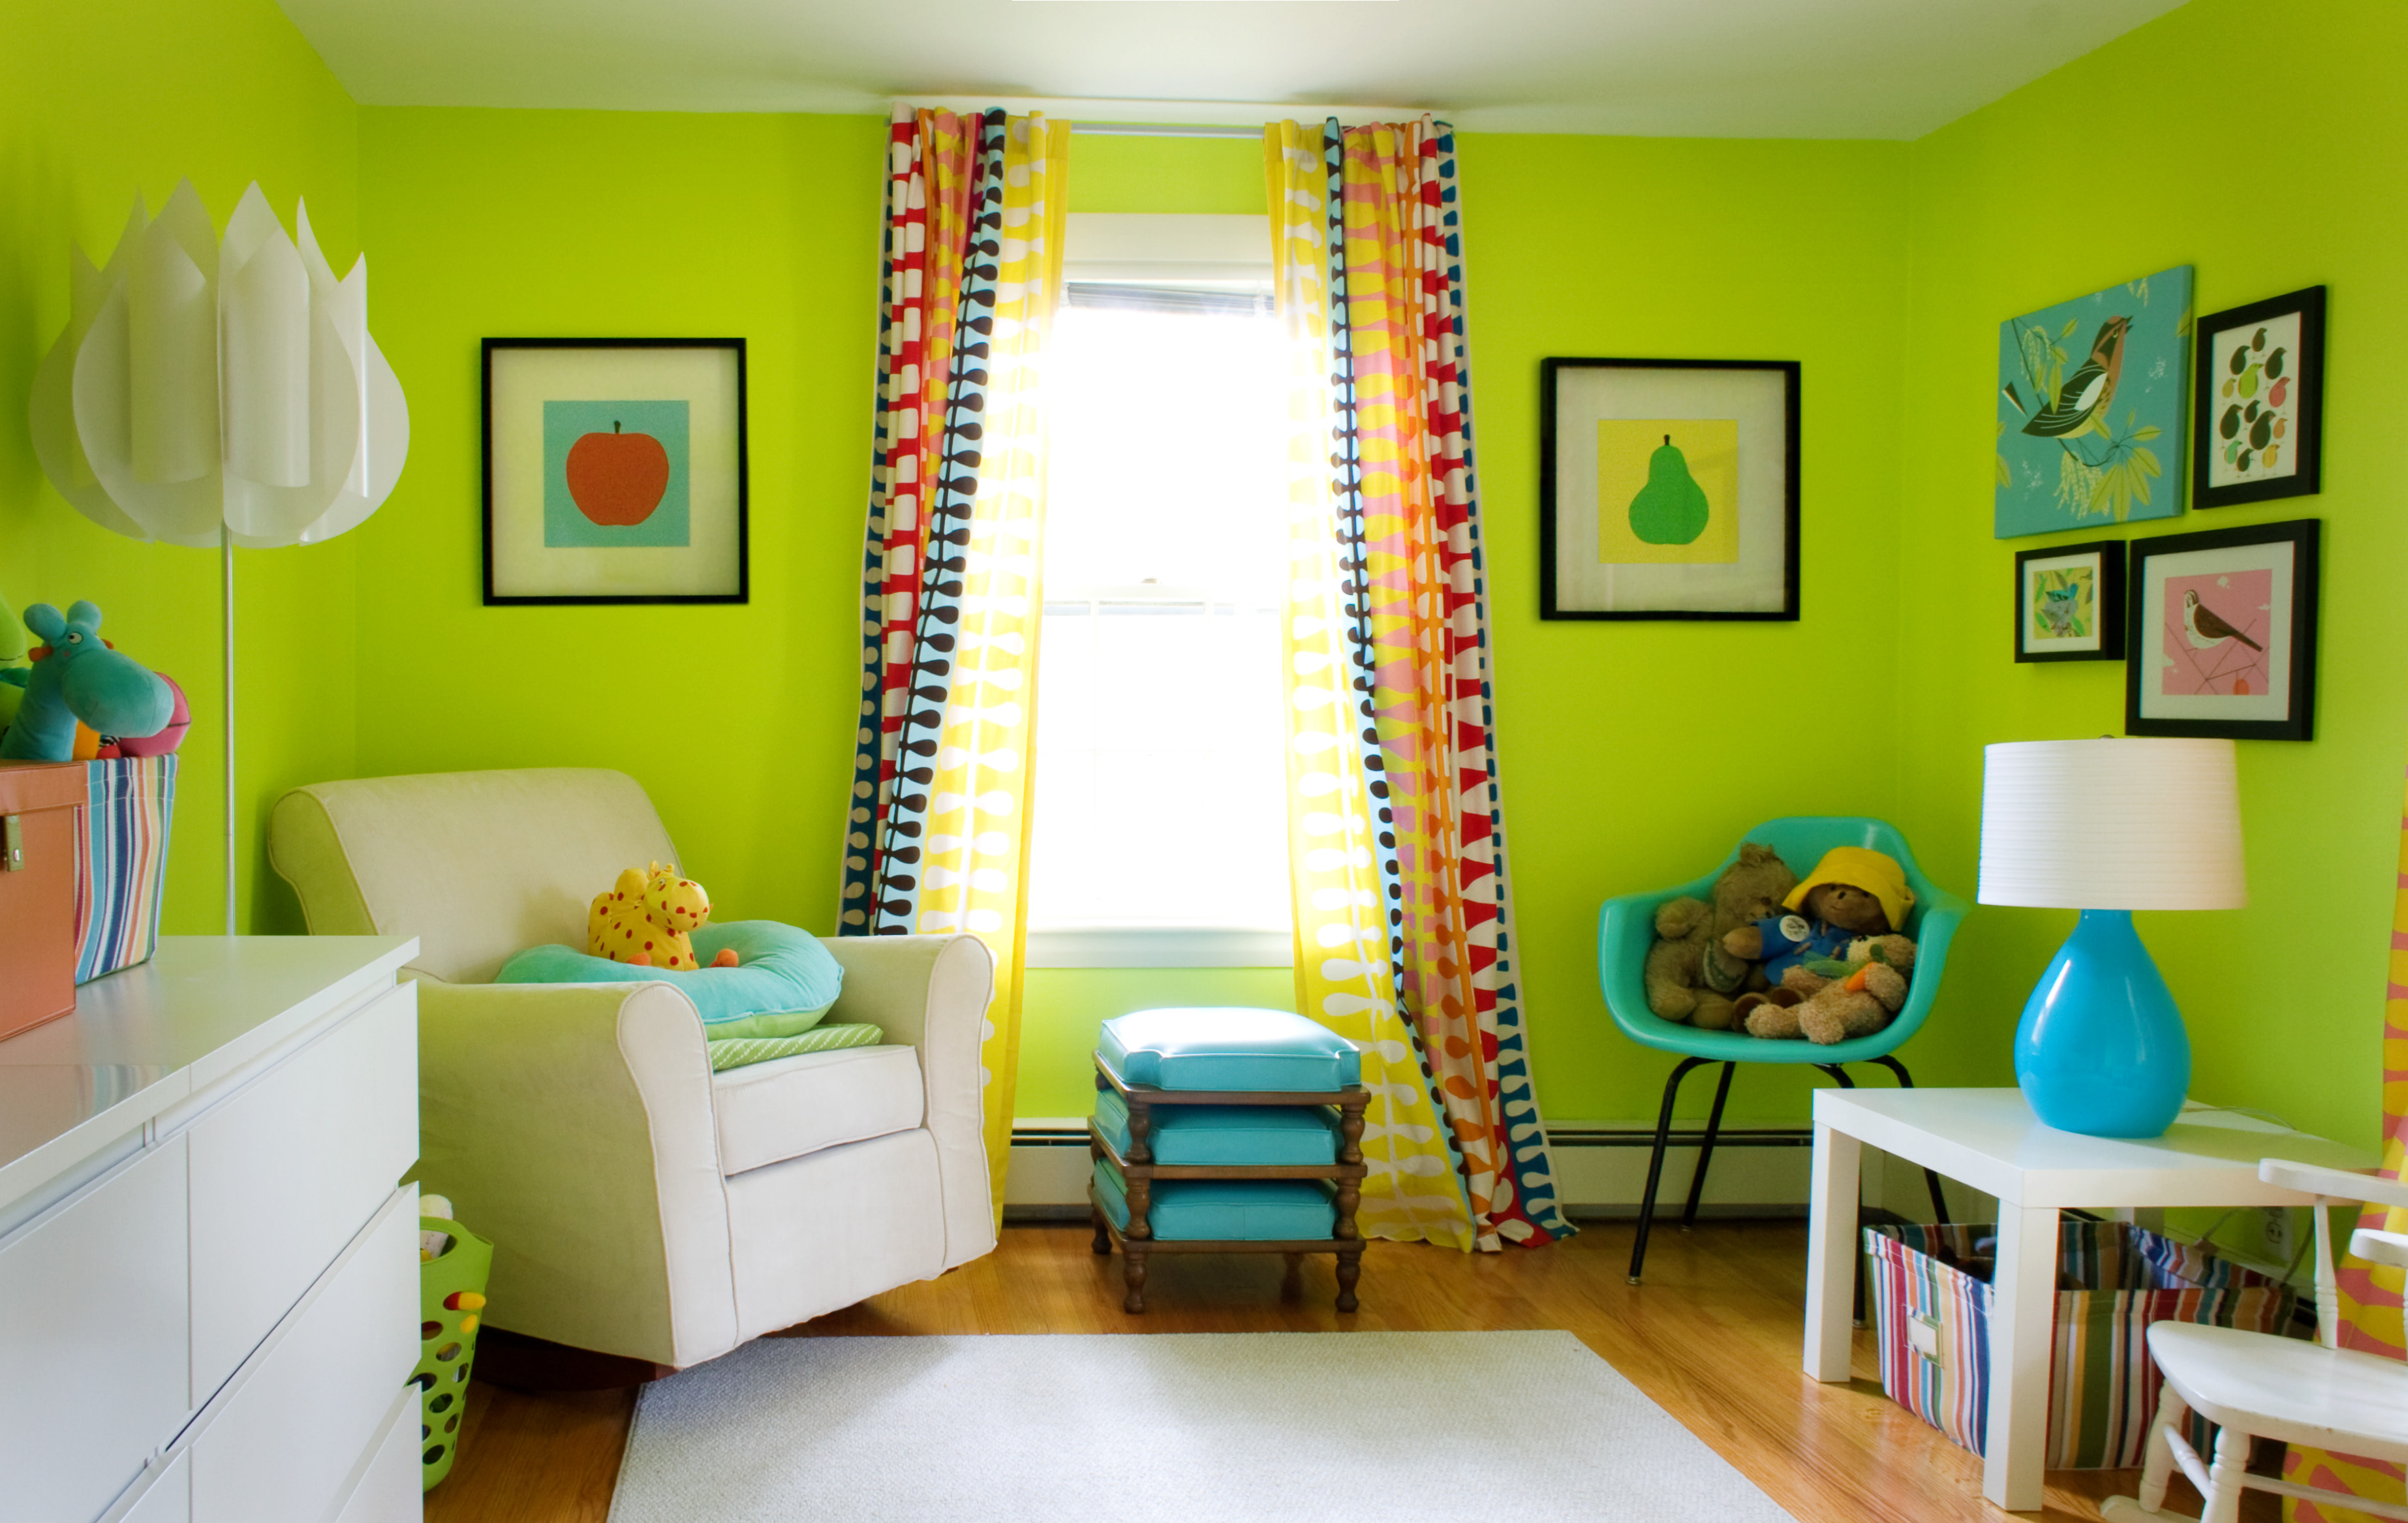
Using this bunting, here are the inspirations I found:
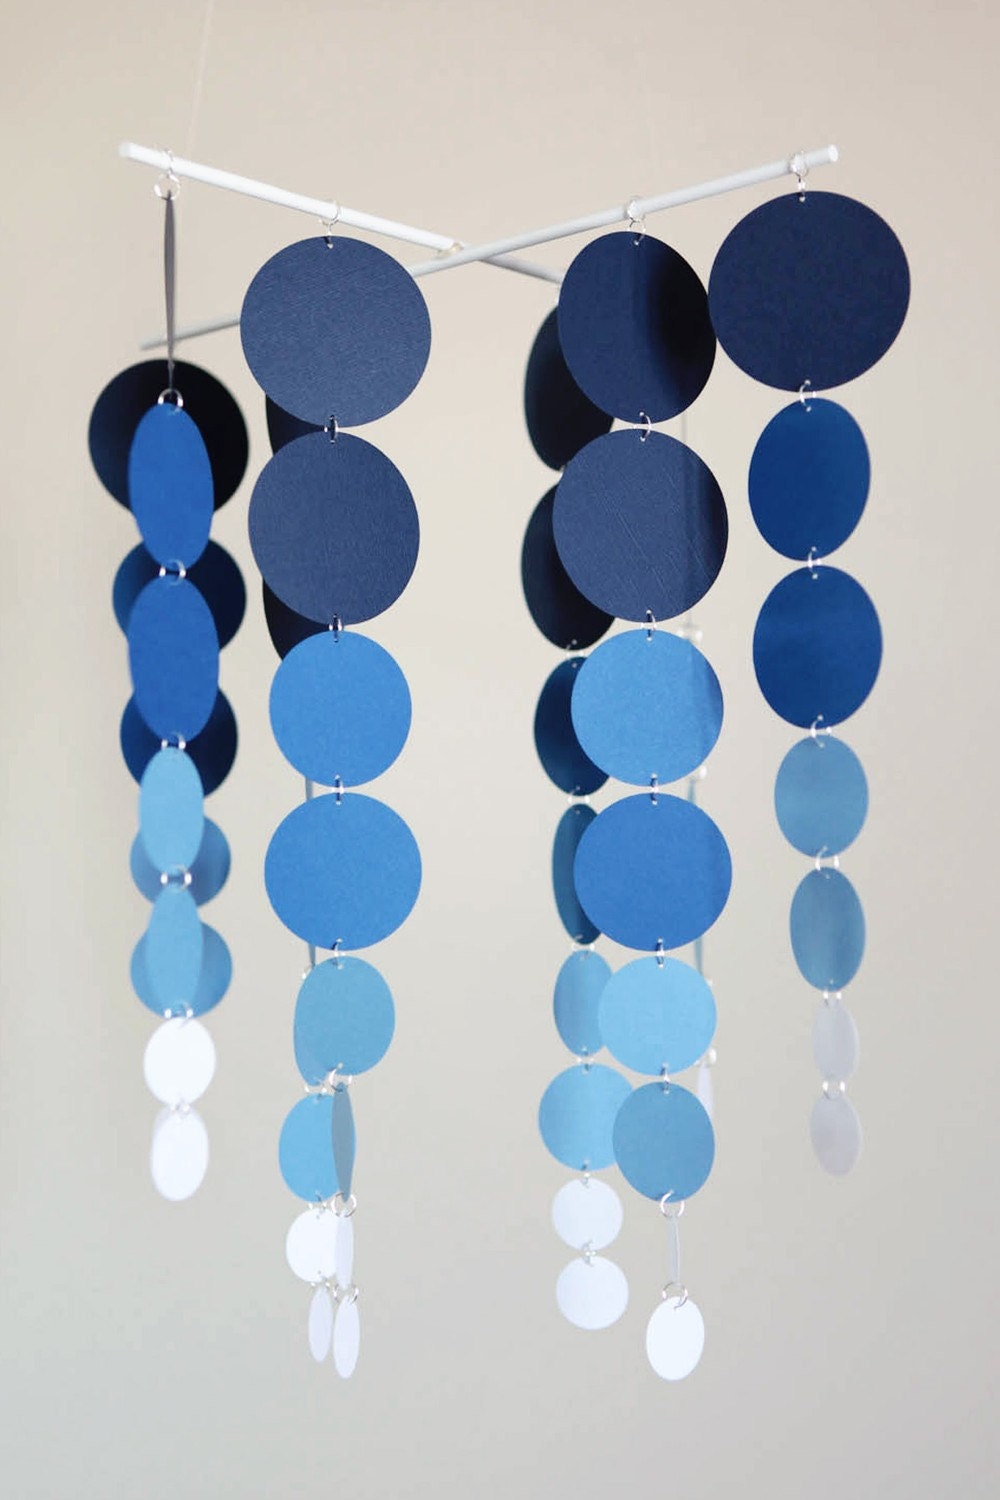
This bright and fun nursery features green and blue circles that would go perfectly with the spotty fabric of the bunting. Check out this guide at Unique Baby Gear Ideas for painting the perfect polka dots, or how about buying some decals:
 |
Decal by Wall Glitz
|
I love the lime tree wall sticker in this nursery:
Check out these other samples on Etsy:
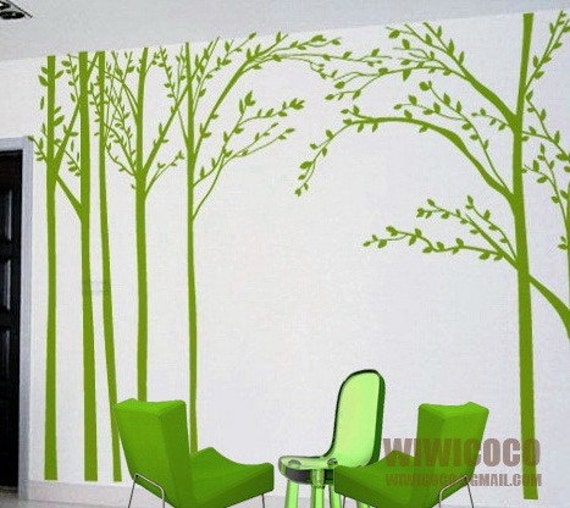 |
| by Wiwicoco |
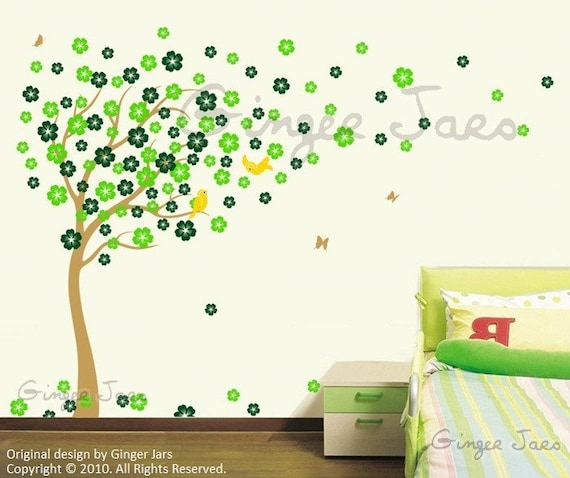 |
| by Wall Decors |
This amazing crib is stunning and matches this theme perfectly:
And who can resist this lucious painted dresser:
The lime and turquoise elements to this nursery make it bright and airy, especially lusting over the chair and table lamp:
 |
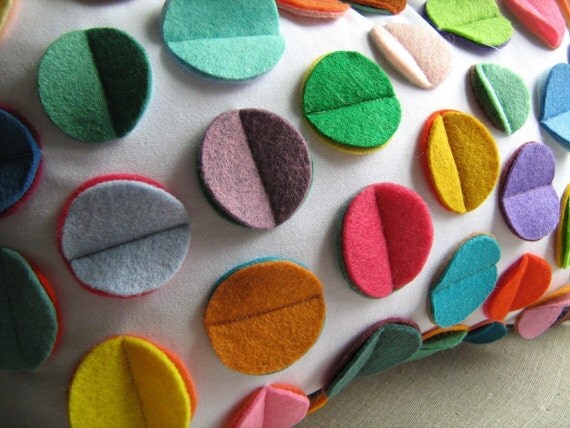
And finally you can't do without those little details, courtesy of some great Etsy finds:
 |
| by Lil Sprout Creations |
 |
| by Color Bee |
 |
| by De Deetsy Shop |
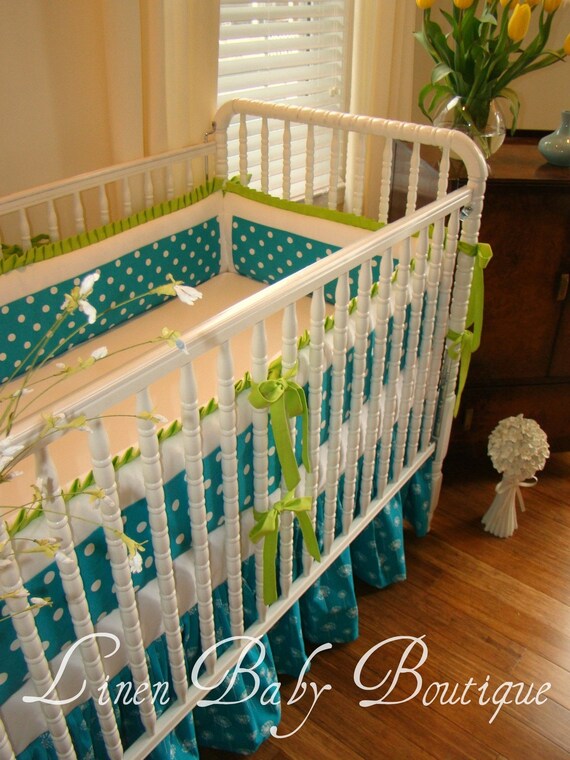 |
| by Linen Baby |
 |
| by Lucky Deer Designs |
 |
| by Little Dreamers Inc |
So with some time and research you too can find the perfect inspirations for any theme! Go on, have a go, I'd love to see your results!
How To Make A No-Sew Cushion with Applique Design
Wednesday, 6 April 2011
As my sewing machine is currently locked up in a storage container in the UK and my hand-stitching abilities leave a lot to be desired, a lot of the ideas I looked at for creating things in Holly's nursery were unachievable. However I really wanted to make a cushion to go on my glider in the nursery and so had a hunt around for thoughts on how I could achieve this. I came across this beautiful nursery by the B-Line which has so many ideas that I wanted to try.
The one I loved the most was this silhouette cushion with her dog on:
As Jasper, our Jack Russell Terrier, is such a huge part of our family (after all, we flew him from the UK to New York and then New York to California, if that's not devotion I don't know what is!) I really loved the idea of featuring him in Holly's nursery. B-Line had created this cushion with fabric she specially designed and ordered from Spoonflower. This was a bit costly for myself and I relished the challenge of figuring out how to create this without making one stitch! I had already used Wonder Web to create my bunting (see The Beginning of the Inspiration post) and so thought I would give this a try. So here is my method of creating a no-sew cushion with an appliqued design:
You will need:
Fabric (I measured a throw-pillow I already had and then added two inches all the way round for seams)
'Heat'n Bond' to adhere silhouette to cushion
Wonder Web
No-sew Velcro strips
Scissors
Pins
Stuffing
Iron
Ruler
Instructions:
1. First I cut my fabric. Making sure I added two inches on each side from my template cushion, using a ruler I drew two squares of fabric and cut them out.
2 I then found a picture of Jasper on my computer that would create a good silhouette. After a lot of trial and error I blew it up to the right size for my cushion, printed it off and cut it out.
3. Following the instructions on the packet, I ironed one side of the 'Heat'n Bond' to a contrasting piece of fabric big enough for my Jasper template.
4. I pinned the Jasper template to a contrasting fabric and cut out my shape.
5. Taking one of the pieces of fabric I had previously cut out for my cushion, I placed my silhouette in the middle and ironed it in place using the reverse side of the 'Heat'n Bond' to stick it down, again following the instructions on the packet.
6. I grabbed the other piece of fabric I cut out earlier for the cushion. With the wrong side facing up, I folded one edge down on both pieces by a quarter of an inch. I measured the Wonder Web along the length of the fold and cut. Placing the Wonder Web under the fold, I ironed it down to hold the fold in place. This was the edge I then created an opening on using the Velcro.
6. Next came time to put the cushion together. I measured my Wonder Web along my cushion pieces and cut a piece off the same length.
7. Placing the fabric wrong side together (i.e. inside out), I pinned one side together with the Wonder Web placed in between the layers.
8. I then ironed this side together, making sure the Wonder Web was in the right place. This created one seam.
9. Repeat this for three more edges of the cushion, leaving the edge with the folded sides open.
10. To create the opening on the final side, I cut the Velcro so it was about half an inch shorter than the folded seam at either end. Following the instructions, I pressed the two pieces of the Velcro together, peeled off the backing paper and then placed it on one side of the seam of my cushion. I pressed down firmly and held it for one minute. Next I pressed the other side of the seam onto the Velcro and held down for one minute. This created a firm opening for my cushion.
11. I turned the cushion the right way out and using the stuffing I then filled it to the desired size.
12. Finally, I pressed the Velcro opening closed and voila! A personalized silhouette cushion made without a needle and thread in sight!
 |
| Original Picture |
 |
| Finished Cushion |
 |
| In its new home |
Why Are Children’s Clothes Sizes All So Different?
Friday, 1 April 2011

Holly has just grown out of most of her 0-3 clothes and so I have done what is turning into the monthly packing away of clothes that no longer fit (which now fills a small suitcase) and moved the bigger sized clothes to the front of her wardrobe. As I did this I realized I did not have any of those much-needed bodysuits (or vests to some) in the next size up. FAIL! So off to Target John and I went to buy some in the 3-6 months size. Stupidly I bought a pack of Gerber vests, as they were the cheapest and came in packs of 5. Having owned Gerber vests before I should have remembered that Holly grew out of the newborn size within minutes and so, with her larger-than-average waistline (which I am assured will return to a more ladylike size once she is moving about) there was no way she was fitting in the correct size. Lo and behold after her Sunday night bath (note: please be assured that we do bath her more than once a week), as I attempted to fasten the newly-acquired 3-6 month vest under her butt, I realised my mistake.
It’s not the first time that supposed aptly-labelled clothing have either barely squeezed over her baby-booty or left her with enough arm and leg room to make another sleepsuit. It makes me wonder where these companies get their sizing from and how come there is such a variation on sizes. Now, to be fair, Holly seems to have the proportions of a lemming, with short arms, long legs and a particularly rotund torso, but that doesn’t mean that in each store I peruse I should be required to extract her from the comfort her stroller and measure every inch of an outfit up to her to ensure I can more than squeeze her into it when I get it home.
Gerber seem to be at one end of the scale. When I googled around I found a lot of people complaining about the same problem. I also found their ‘onesie’ sizing chart from Grunge Zombie:

Looking at this it seems Holly fits into the 6-9 months bracket (at 4 months) and I therefore should be buying a larger size than her age. If I compare it to the Children’s Growth Data on the CDC website, it states a 3-6 month old child in the 50th percentile should be 16-19lb, which is the 6-9 month old stage in Gerber sizes, so Gerber onesies are measuring smaller than the Growth Data Chart states they should be.
One of the larger sizes for me is the UK’s Tesco (having friends and family in the UK Holly has got a worldwide wardrobe). Tesco’s sizing chart is as follows, found at Clothing at Tesco's:
Single
|
0/0
|
0/0
|
0/0
|
3 mths
|
6 mths
|
9 mths
|
12 mths
|
Dual
|
Tiny Baby
|
Early Baby
|
Newborn
|
0-3mths
|
3-6mths
|
6-9mths
|
6-12mths
|
Height
|
44cm
17”
|
50cm
20" |
56cm
22" |
62cm
24½" |
68cm
27" |
74cm
29" |
80cm
31½" |
Weight
|
2.3kg
5lbs |
3.4kg
7.5lbs |
5kg
11lbs |
6.5kg
15lbs |
8.5kg
19lbs |
9.5kg
21lbs |
11.5kg
25lbs |
Holly would therefore fit into the 3-6 month range (at 25” she would have some room to spare). As this is a UK brand I found a UK growth chart to compare at The Royal College of Paediatrics and Child Health website. On this chart Tesco’s range just fits the 3-6 months on height (this chart states the average at 6 months is 66cm) on weight (the average weight at 6 months being 7.25kg). Therefore Tesco sizes prove to be slightly on the larger side than the average growth chart shows.
 It seems there are many discrepancies on sizes store to store and indeed country to country. Much of this is due to the fact that, like adults, babies come in all shapes and sizes meaning that there is no real rules on guidelines for their clothes. So how does a parent find the right size for their baby without a lot of trial and error and inevitable refunds and exchanges?
After much trawling around I came across this fantastic website called Sizetracker. You input your child’s age, sex, height, weight, waist and head size and select the brand you require (it even has some UK brands like George @ Asda) and it tells you what size your baby will fit. For example at Gymboree, another store where the clothes always seemed on the small side, it informs me Holly would be in 6-9 months, whilst at Guess Kids she is in 3-6 months. Whilst this may not be practical when you are in a shop and not sure what size to buy, it is a helpful tool if you can plan ahead.
The best advice for any new parent I can give is to find a brand you like, that wears well and, of course, fits your baby and stick with it. My personal favourite is Carter’s. They had a wide range of items in brilliant colors and designs, they fit Holly for a reasonable length of time and aren’t too painful on the wallet. And when she is growing out of one size, I have an excuse to shop, with the reassurance that what I buy will fit her. This way life is a lot easier without all this guesswork! Although of course having to return something just means I have to go back to the mall - any excuse for a shopping trip....

How To Survive Life With A Newborn Baby
Tuesday, 29 March 2011

The Rug Challenge
Thursday, 24 March 2011
As I was wading through the many crafting projects out there looking for something to grab me, I came across an idea that seemed impossible - making a DIY rug. After delving further, I found this great tutorial by Moda Bake Shop and had to share.

And, as always, I have to share my own version. It was more tricky than I thought and took me quite a while, so in the end its more the size of a place mat than a rug, but it's cute anyway!

And, as always, I have to share my own version. It was more tricky than I thought and took me quite a while, so in the end its more the size of a place mat than a rug, but it's cute anyway!

The beginning of the inspiration
Wednesday, 23 March 2011
During my pregnancy I spent a lot of time alone in the apartment. My husband worked all day and had the only car and as we had just moved to the area I didn't know anyone I could go visit. This meant I had a lot of time on my hands and not much to do with it. After chatting with ladies on various pregnancy forums, such as Baby and Bump I became motivated to try and make some things for my daughter's nursery. I have always been a creative person and enjoyed craft projects, but it had been a while since I attempted any. I trawled the Internet in search of some ideas and came across many pages which inspired me. Not having a sewing machine did limit me, however when I discovered this 'no-sew' tutorial I was laughing.
Red Ted Art's Blog
After a couple of attempts with the Wonder Web, here is my own finished version:

I would definitely recommend anyone to have a go, it was quick to make and with Red Ted's great instructions, easy too!!
Red Ted Art's Blog
After a couple of attempts with the Wonder Web, here is my own finished version:

I would definitely recommend anyone to have a go, it was quick to make and with Red Ted's great instructions, easy too!!
Introducing Hollybobbs
Sunday, 20 March 2011

Meet my daughter Holly. Born in December 2010 she is a Sagittarius and as psychicguild.com states, Sagittarians possess a natural exuberance, sense of adventure and love of life that makes them one of the most optimistic zodiac signs of all. Looking at the Chinese Star Signs, she was born in the year of the Tiger, and according to the online Chinese astrology website , this means she is adventurous and courageous and a born leader! So I better watch out!
As I type this she is currently sat watching Disney Junior, after waking up from her nap under her rainforest playmat. Clearly she is already an adventurer!
Technorati - RRPGVQC5M7AN
Subscribe to:
Posts (Atom)


